Showing posts with label printmaking. Show all posts

10/31/2015

Happy Halloween


With each year that passes Halloween becomes more of a tradition here, our house was no exception with family parties, pumpkins, fake spiders-the list goes on. When I was a child the focal point of the season was Bonfire Night with treacle and toffee apples.


I do love this time of year with its abundance of fruit and berries. It has been a good year for apples this year and my little Malus Gorgeous has been on top form. This tiny crab apple tree produces fruit no bigger than a large cherry. We never try to cook them, preferring to leave them for the birds to enjoy.


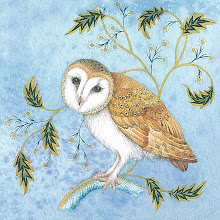
I made this little study with coloured pencils.

We went down to London to visit The Royal Miniature Society's exhibition at the Mall Gallery to see this years annual exhibition. I was thrilled to have five pieces accepted. The exhibition is now closed but you can still see the whole thing on their website, many pieces are still for sale and would make lovely gifts for Christmas perhaps? My work is numbered 229-233.


I made some new greeting cards from the artwork created for the miniatures, some are in my Etsy shop and there are more on the way. 


A quick hop over the border into Wales enabled us to use the facilities at the Print Centre in Wrexham. I managed to finish two editions, one intaglio and one linoprint. It was suggested that I try hand colouring some of the dry point prints and found that using water colour pencils worked well.


The Halloween print at the top of this post, the drawings, cards and prints all found their way here-https://www.etsy.com/uk/shop/acornmoon

7/12/2015

Mind your P's and Q's.

     
Around this time forty years ago, I graduated from art college. I had studied textile design at The Manchester School of Art and Design- now Manchester Metropolitan University. I met up with my fellow graduate friend Pam and had a lovely day reminiscing about our student days, our hopes and dreams all those years ago. We enjoyed exploring old haunts and discovering the more recent additions to the city.


When we were students The John Rylands Library was something of a mystery to us, in fact I don’t really remember it ever being accessible to the public until fairly recently. It is now one of Manchester’s tourist attractions and welcomes visitors with open arms. It also has a more modern extension with exhibition areas, cloakrooms, a cafĂ© and a shop.


Like many of Manchester’s buildings the library was designed in the Neo-Gothic style so loved by the Victorians. It has many splendid features, beautiful stained glass, hidden balconies, amazing ceilings and books of course! It also hosts exhibitions and houses several printing presses and we both wished we had the space and funds to own at least one of those presses.

Although an Albion style press is far too large and difficult to accommodate, the Adana is much more suited to home use. So, when my blog friend Gretel told me she had one in need of a good home, how could I refuse?

Adana 8 by 5 without rollers
Those of you who are familiar with Gretel will be pleased to know that she is doing well, busy as ever and enjoying life in rural “Middle of Nowhere”. She made us some scrumptious scones and a lovely day was had by all. I returned with this- An Adana 8 by 5.

I hope to someday use the press to print my wood engravings, small lino prints and maybe even some type. In order to learn more about the press and how to restore and use it, I decided to take myself off to this amazing place- The St Bride Foundation, which offers classes in printmaking and typography. It is situated just off Fleet Street in London and is well worth a visit if you are ever in the area.


Learning about typography is fascinating. If you have ever used a word processor or computer application you will be familiar with font sizes and types. It all fits into place when you realise that a point is an actual measurement- an inch divide into 72.

Next time you select a 12-point font think of it as a measurement, 12 over 72 is one sixth of an inch also known as a pica. My head is in a spin.

The other thing you have to be very careful of is minding your P’s and Q’s. When you select a letter it appears back to front. As you can see I made a mistake, can you spot it? Spelling was never my strong point; as for back to front spelling- no chance!


4/01/2014

Woodcut Printing.


For the last four Wednesdays I have been taking part in a Woodcut Printing Class at The Hotbed Press in Salford/Manchester. Our lovely course tutor was Oliver Flude who has a website here-

Oliver inspired us by his skill and enthusiasm for his craft and showed us some of his own prints together with the blocks he had used.

Previously I have tried my hand at wood engraving where the image is engraved onto the end grain of a piece of hardwood. In woodcut printing the long-grain is used, this is very different and has a charm all of its own. Unlike wood engraving, this method of printing is capable of showing some of the character of the wood. The wood is softer and the grain more a feature in the final print.

Over the course we had four three-hour sessions, to learn the basics. All our efforts had to be concentrated into creating an image in a short space of time. This meant that a bold, energetic and free style took over from my usual tightly controlled style. This was both liberating and scary in equal measures.

We had the luxury of printing on a beautiful old Columbian Press, the hours flew by and everyone had an enjoyable and productive time.


In the first week we got to try out various tools and learn the kind of marks they made. The wood we used was a Japanese plywood which was easy to cut into along the grain, not so easy cross grain. We all managed to produce a one colour print- here is my first effort.


In week two we introduced colour, using a reduction technique. My print was a disaster and went into the bin. However, they say you learn by your mistakes.

On the third week we used a combination of techniques including paper stencils.


On the final week we pulled everything together and produced our final images.
My penguin was a reduction print using a gradation of blue into white and then a second printing of black on top.(see top).

At the end of four weeks we were all sad to say farewell, everyone enjoyed taking part and I think we will all use our newfound skills in the future.

If anyone is interested I have put some of my prints in my Etsy shop- https://www.etsy.com/uk/shop/acornmoon